Creating a lush and vibrant lawn starts with proper soil preparation. When it comes to establishing new grass from seed, preparing the soil is a crucial step that sets the foundation for healthy growth and long-term success. Soil quality directly impacts the germination of the grass seed and its ability to develop strong roots. We will guide you through the necessary steps to prepare new soil for grass seed. From assessing soil conditions through conducting a soil test, to clearing and leveling the site, selecting the right seed, and implementing proper irrigation techniques, we’ll provide you with the knowledge and insights you need to ensure your grass seed thrives and transforms your outdoor space into a lush, inviting landscape. Get ready to unlock the secrets of soil preparation and take your lawn to the next level.
Assessing Soil Conditions
Conducting a soil test:
Before embarking on any soil preparation, it’s crucial to conduct a soil test to understand its current condition and nutrient composition. A soil test provides valuable insights into pH levels, nutrient deficiencies, and organic matter content, enabling you to make informed decisions about soil amendments. You can either opt for professional soil testing services or choose a DIY soil test kit available at gardening centers. Collect soil samples from different areas of your lawn, following the instructions provided, and send them for analysis. Soil testing helps you tailor your soil preparation efforts to address specific needs, ensuring optimal conditions for grass seed germination and growth.
Interpreting soil test results:
Once you receive the soil test results, it’s essential to understand their implications for your lawn. Pay close attention to pH levels, which determine the soil’s acidity or alkalinity, as well as the levels of essential nutrients such as nitrogen, phosphorus, and potassium. The pH level affects nutrient availability to plants, so you may need to adjust it accordingly. Based on the test results, you might need to add lime to raise pH or sulfur to lower it. Additionally, the soil test report will indicate any nutrient deficiencies or excesses, allowing you to select the appropriate fertilizers and soil amendments to address those imbalances. Understanding and interpreting the soil test results will guide you in creating the optimal environment for successful grass seed establishment.
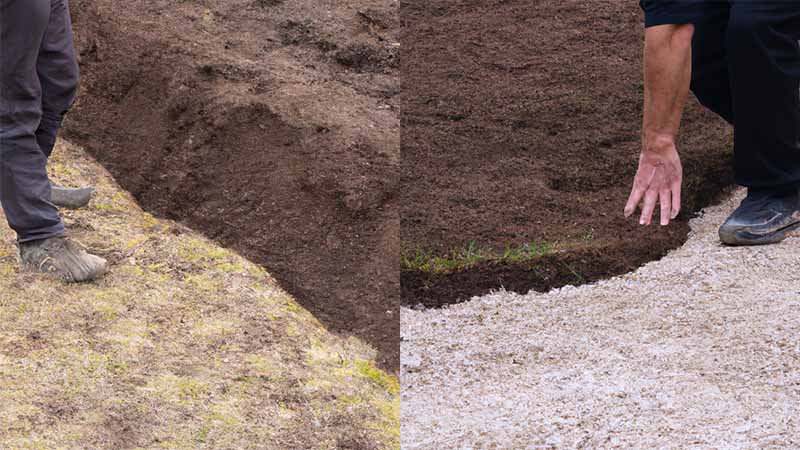
Clearing and Preparing the Site
Clearing the area:
Before preparing the soil for grass seed, it’s important to clear the site of any existing vegetation, rocks, or debris. Remove any large weeds, grass, or plants using a shovel, rake, or weed trimmer. Clearing the area provides a clean canvas for your new lawn and reduces competition for resources.
Soil amendment and cultivation:
To enhance the soil quality and create an optimal environment for grass seed germination, soil amendment is necessary. Incorporating organic matter in the form of compost or well-rotted manure improves soil structure, water retention, and nutrient availability. Spread a layer of organic matter over the site and use a garden fork or tiller to mix it into the top few inches of soil. This process helps break up compacted soil, improves drainage, and provides a nutrient-rich base for the grass seed.
In cases where the soil is excessively compacted, consider aerating the area before soil amendment. Aeration entails making small holes in the soil’s surface to improve air circulation and water infiltration. This process can be done using a manual aerator or a machine specifically designed for this purpose. By alleviating compaction, you create a more favorable environment for grass seed roots to penetrate and establish themselves.
Proper soil amendment and cultivation lay the groundwork for healthy root development and ensure that the grass seed receives essential nutrients, water, and air circulation needed for successful germination and growth.
Leveling and Grading
Importance of proper leveling:
Achieving a level surface is crucial for optimal grass growth and maintenance. Proper leveling ensures uniform water distribution, preventing pooling and runoff, and provides an even surface for mowing and other lawn activities. Additionally, a level lawn enhances the overall aesthetic appeal of your outdoor space.
Steps for leveling the soil:
Identifying high and low spots: Walk across the area and visually identify any high or low spots in the soil. These uneven areas can result from natural variations or previous landscaping activities.
Techniques for filling low areas and leveling bumps:
a. Low areas: Fill in depressions and low spots with a mixture of topsoil and compost, using a shovel or rake to distribute the soil evenly. Ensure that the filled areas are slightly higher than the surrounding soil to account for settling.
b. Bumps or high spots: For bumps or raised areas, gently rake or scrape away the excess soil until it becomes level with the surrounding ground.
c. Using a rake or roller for a smooth finish:
- After filling low areas and leveling bumps, the soil’s surface should be levelled up with a garden rake. Rake back and forth to create an even and uniform layer of soil.
- To further compact the soil and achieve a smoother finish, you can utilize a lawn roller filled with water or sand. Roll the lawn in a crisscross pattern, applying gentle pressure to ensure an even and firm surface.
Remember that proper grading and leveling help promote proper water drainage and prevent water accumulation in certain areas. It is essential to achieve a gradual slope away from structures and towards appropriate drainage points, such as gutters or drainage ditches, to avoid water pooling on the lawn.
By taking the time to level and grade your soil, you establish a solid foundation for your grass seed to thrive, ensuring optimal growth and a visually appealing lawn.
Seeding Techniques
Selecting the right grass seed:
Choosing the appropriate grass seed is crucial for achieving a healthy and resilient lawn. Consider factors such as climate, sunlight exposure, soil type, and foot traffic when selecting the grass seed variety. Common options include cool-season grasses like Kentucky bluegrass or tall fescue, or warm-season grasses like Bermuda grass or zoysia grass. Research the characteristics of each grass type and select the one best suited to your specific lawn conditions.
Seeding methods:
Broadcasting by hand or using a spreader:
- Hand broadcasting: For small areas, you can evenly distribute the grass seed by hand. Divide the seed into two equal portions and apply half in one direction and the other half in a perpendicular direction to ensure even coverage.
- Spreader application: Utilize a seed spreader for larger areas. Adjust the spreader settings according to the seed type and manufacturer’s instructions. Walk in straight lines, slightly overlapping each pass to avoid gaps or uneven distribution.
Overseeding existing lawns or establishing new ones:
Overseeding: If you have an existing lawn, overseeding can help fill in thin or bare areas and improve overall density. Mow the existing grass short and rake away debris to expose the soil. Apply the grass seed using the chosen method, ensuring good seed-to-soil contact.
Establishing new lawns: For bare soil areas, prepare the soil as mentioned earlier and then apply the grass seed evenly using the chosen seeding method.
Calculating the appropriate seed quantity for the area:
- Refer to the recommended seeding rates provided by the grass seed manufacturer. These rates typically vary based on the grass type and the intended purpose (overseeding or establishing new lawns).
- Measure the area in square feet of your lawn and calculate the amount of seed needed based on the recommended seeding rate. It’s better to slightly overestimate the amount of seed to ensure adequate coverage.
After seeding, lightly rake the soil or use a lawn roller to ensure good seed-to-soil contact. This contact is crucial for successful germination. Consider covering the seeded area with a thin layer of straw or erosion control matting to protect the seeds from birds and excessive moisture loss.
By carefully selecting the right grass seed and employing proper seeding techniques, you set the stage for healthy seed germination and establishment, leading to a beautiful and thriving lawn.
Soil Moisture and Irrigation
a. Watering before seeding:
Before seeding, it’s essential to ensure that the soil is adequately moist. Proper soil moisture promotes seed germination and helps establish healthy roots. Water the soil thoroughly a day or two before seeding to ensure it is evenly moist throughout. This pre-soaking allows the grass seed to make good contact with the soil, aiding in germination.
b. Post-seeding irrigation:
Once the grass seed is in place, proper irrigation is crucial for seed germination and seedling establishment. Follow these guidelines for effective post-seeding irrigation:
Frequency and duration of watering:
- Water the seeded area lightly and frequently to keep the topsoil consistently moist. Aim for shallow, frequent waterings to prevent the soil from drying out or becoming waterlogged.
- Water 1 to 2 times per day, depending on the weather conditions and soil type. Short watering sessions of 5 to 10 minutes are generally sufficient.
Techniques for preventing overwatering or underwatering:
- Monitor the soil moisture regularly. The top inch of soil should remain consistently moist without being overly saturated.
- Avoid overwatering, as it can lead to shallow root development and promote disease.
- On the other hand, avoid underwatering, as it can hinder seed germination and establishment. Ensure the soil does not dry out between watering.
- Using irrigation systems or sprinklers effectively:
- If using an irrigation system or sprinklers, adjust them to provide even coverage across the seeded area. Ensure the water reaches all portions of the soil evenly.
- Consider using a pulsating or oscillating sprinkler, which provides better coverage compared to a stationary sprinkler.
- Be mindful of local watering restrictions and regulations, if any, and adhere to them.
- Proper soil moisture management is crucial during the initial stages of grass seed establishment. It’s important to monitor and adjust the watering regimen as the grass seedlings emerge and develop. Gradually reduce the frequency of watering while increasing the duration to encourage deeper root growth. This transition will help establish a resilient and drought-tolerant lawn.
By providing the right amount of moisture through proper irrigation techniques, you optimize the conditions for grass seed germination and establish a strong foundation for a healthy and thriving lawn.
Maintenance and Aftercare
1. Monitoring germination and growth:
- After seeding, it’s crucial to closely monitor the progress of germination and seedling growth. Keep an eye on the seeded area and look for signs of sprouting grass. Germination times vary depending on the grass type, but typically it can take anywhere from 7 to 21 days.
- Be patient and avoid disturbing the seeded area during this time. Minimize foot traffic and keep pets away to prevent damage to emerging seedlings. Lightly water as needed to maintain soil moisture while being careful not to overwater.
2. Establishing a mowing and fertilization schedule:
a. Initial mowing after seedling emergence:
Once the grass seedlings have reached a height of about 3 to 4 inches, it’s time for the first mowing. Set the mower blades to a height of about 2 inches, being careful not to cut the grass too short. Removing only the top third of the grass blades encourages healthier root growth and helps the grass develop a dense, lush appearance.
b. Choosing the right fertilizers and application techniques:
As the grass seedlings continue to grow, they will benefit from proper nutrition. Consider applying a slow-release or controlled-release fertilizer specifically formulated for young grass. Follow the manufacturer’s instructions regarding application rates and timing.
Apply the fertilizer evenly across the lawn, using a broadcast or drop spreader for larger areas. Take care to avoid overlapping and causing fertilizer burn. Water the lawn after fertilizing to ensure the nutrients penetrate the soil and reach the roots.
c. Regular maintenance practices to ensure long-term success:
To foster a healthy lawn, continue with regular maintenance practices, including:
- Regular mowing: Set your mower to the recommended height for the grass type and maintain a consistent mowing schedule to keep the lawn at an optimal height.
- Proper watering: Transition from frequent, shallow watering to deeper, less frequent watering once the grass is established. Water deeply to promote deep root development and ensure the soil receives adequate moisture.
- Weed control: Keep an eye out for weeds and address them promptly. Hand-pull or use appropriate herbicides to control weeds without harming the newly seeded grass.
- Aerating and overseeding: Over time, aerate the lawn to improve soil compaction and overseed as needed to fill in any thin or bare areas.
By implementing a regular maintenance routine, you’ll promote the long-term health and vitality of your lawn. Consistent care and attention will help your grass seedlings grow into a lush, dense lawn that enhances the beauty of your outdoor space.
Conclusion
Preparing new soil for grass seed is a critical process that sets the stage for a healthy and thriving lawn. By following the outlined steps, from assessing soil conditions and clearing the site to leveling the soil, selecting the right grass seed, and implementing proper irrigation and maintenance practices, you can create an optimal environment for successful seed germination and long-term growth. Remember to monitor soil moisture, provide adequate irrigation, and establish a regular maintenance routine to ensure the health and beauty of your lawn. With proper soil preparation and ongoing care, you’ll soon enjoy the lush, vibrant landscape you’ve always envisioned. So, roll up your sleeves, put these guidelines into action, and get ready to witness the transformation of your outdoor space into a lush, inviting haven that brings joy and beauty to your surroundings.