Welcome to our comprehensive guide on how to care for a lady fern (Athyrium filix-femina). If you’re an avid gardener or simply want to add a touch of elegance to your indoor or outdoor spaces, lady ferns can be an excellent choice. These beautiful ferns not only bring a sense of serenity and natural beauty but also thrive when provided with the right care and maintenance. Here, we will explore the essential aspects of lady fern care, providing you with the knowledge and tips you need to ensure the optimal growth and health of your lady ferns. Whether you’re a beginner or an experienced plant enthusiast, this guide will equip you with the necessary information to nurture your lady ferns and enjoy their lush foliage for years to come. So, let’s dive in and discover how to create the perfect environment for your lady ferns to thrive!
Understanding the Lady Fern
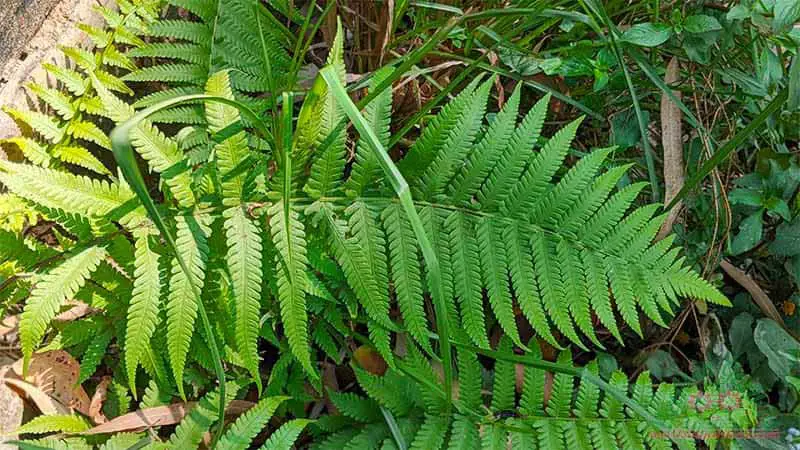
The lady fern, scientifically known as Athyrium filix-femina, is a popular choice among fern enthusiasts for its graceful fronds and delicate appearance. This fern is recognized for its adaptability and durability and is native to temperate parts of Europe, Asia, and North America. Understanding the characteristics and growing conditions of the lady fern is essential to provide it with the care it requires.
A. Description of the Lady Fern: Lady ferns feature feathery, lacy fronds that can reach a height of 1 to 3 feet (30 to 90 centimeters). The fronds emerge from a central crown and gracefully arch outward. Each frond consists of numerous leaflets that give it a soft and airy appearance. The leaflets are typically a vibrant shade of green, adding a touch of freshness to any garden or indoor space.
B. Native Habitats and Growing Conditions: Lady ferns can be found in various habitats, including woodlands, moist meadows, and shady areas along streams and ponds. They thrive in areas with cool to moderate temperatures, usually ranging from 60°F to 75°F (15°C to 24°C). While they prefer shade or filtered sunlight, they can tolerate some morning or late afternoon sun if provided with sufficient moisture. Lady ferns also appreciate high humidity levels, which mimic their natural habitat.
C. Popular Varieties of Lady Ferns: There are several popular varieties of lady ferns available, each with its unique characteristics. Some notable varieties include “Victoriae” with fronds that are more finely divided, “Frizelliae” with its unique “tassel” fronds, and “Lady in Red” with reddish stems and veins that add a striking contrast to the green foliage. These varieties offer options for different preferences and can add diversity to your fern collection.
Understanding the lady fern’s appearance, native habitats, and preferred growing conditions will serve as a foundation for providing the appropriate care. In the following sections, we will delve into the key aspects of caring for lady ferns, including creating an ideal environment, proper planting techniques, watering and moisture management, fertilization, pruning and maintenance, common pests and diseases to watch out for, propagation methods, and more. By the end of this guide, you will be equipped with the knowledge to foster the growth and beauty of your lady ferns.
Setting the Ideal Environment
Creating the perfect environment is crucial for the health and vitality of your lady fern. In this section, we will explore the key factors to consider when setting up the ideal environment for your fern to thrive.
A. Light Requirements: Lady ferns prefer indirect or filtered light. They thrive in shady areas with dappled sunlight or gentle morning sun. Avoid exposing them to direct sunlight, as it can scorch their delicate fronds. If you’re growing lady ferns indoors, place them near north-facing windows or provide them with artificial lighting that mimics the appropriate light intensity.
B. Temperature and Humidity Preferences: Lady ferns thrive in cool to moderate temperatures. Ideally, the temperature should range between 60°F and 75°F (15°C to 24°C). Avoid placing them in areas with extreme temperature fluctuations or drafts. Additionally, lady ferns prefer high humidity levels, typically found in their native woodland habitats. Increase humidity by misting the fronds regularly or placing a tray of water near the plant to allow for evaporation.
C. Selecting the Right Location: When choosing a location for your lady fern, prioritize areas that provide the desired light conditions and temperature range. Indoor spaces such as bathrooms, kitchens, or basements can be suitable due to their higher humidity levels. Outdoors, consider planting lady ferns in shaded garden beds, beneath trees, or in areas with partial shade.
By setting up an environment that mimics the natural conditions in which lady ferns thrive, you provide them with the best chance of flourishing. In the next section, we will discuss the proper techniques for planting and potting your lady fern to ensure optimal growth and establishment.
Planting and Potting
Proper planting and potting techniques are essential to provide your lady fern with a suitable growing medium and ensure its root system develops well. In this section, we will guide you through the steps of planting and potting your lady fern.
A. Choosing the Appropriate Pot or Container: Select a pot or container that allows for proper drainage. Lady ferns prefer containers with drainage holes at the bottom to prevent waterlogged soil, which can lead to root rot. Opt for a pot that provides enough space for the fern’s root system to grow and expand over time.
B. Soil Requirements: Lady ferns thrive in moisture-retentive, well-draining soil. Use a high-quality potting mix that contains organic matter such as peat moss, compost, or well-rotted leaf litter. These organic components help retain moisture while allowing excess water to drain away, preventing waterlogging.
C. Step-by-Step Guide on Planting a Lady Fern:
- Prepare the potting mix: Combine the potting mix with organic matter to create a well-balanced medium.
- Fill the pot: Fill the pot or container with the potting mix, leaving enough space at the top for watering.
- Prepare the lady fern: Gently remove the lady fern from its nursery container. If the root ball is tightly bound, gently loosen the roots to encourage outward growth.
- Plant the fern: Place the lady fern in the center of the pot, ensuring that the top of the root ball is level with or slightly below the rim of the pot.
- Backfill and firm the soil: Fill the remaining space around the root ball with the potting mix, gently firming it to eliminate air pockets.
- Water thoroughly: After planting, water the fern thoroughly to settle the soil and ensure good contact between the roots and the growing medium.
Remember to keep the soil consistently moist but not waterlogged, as lady ferns prefer a humid environment. Monitor the moisture levels regularly and adjust your watering schedule accordingly. In the next section, we will discuss watering and moisture management techniques to help you maintain the optimal moisture balance for your lady fern.
Watering and Moisture Management
Proper watering and moisture management are crucial for maintaining the health and vitality of your lady fern. In this section, we will guide you through the best practices for watering and ensuring adequate moisture levels for your fern.
A. Watering Frequency: Lady ferns thrive in consistently moist soil. Water your fern whenever the top inch (2.5 centimeters) of soil feels slightly dry to the touch. Avoid overwatering, as it can lead to root rot and other issues. It’s better to underwater slightly than to overwater. Aim to provide enough water to thoroughly moisten the soil without allowing it to become waterlogged.
B. Watering Techniques: When watering your lady fern, use a gentle and thorough approach. Water the soil evenly around the plant, ensuring that the water reaches the root zone. Avoid wetting the fronds excessively, as this can lead to fungal diseases. Consider using a watering can with a narrow spout or a misting spray bottle to provide a gentle and controlled stream of water.
C. Moisture Retention Techniques: Lady ferns appreciate a humid environment. Increase humidity levels around your fern by misting the fronds with water regularly. You can also place a tray filled with water near the plant to allow for evaporation and create a microclimate of higher humidity. Grouping your ferns together can also help create a more humid environment as the plants release moisture through transpiration.
Remember to observe your lady fern closely and adjust your watering schedule based on its specific needs. Factors such as temperature, humidity levels, and the potting mix used can affect the frequency of watering. Regularly check the moisture levels in the soil and adjust accordingly to maintain the optimal moisture balance.
Fertilization and Nutrition
Proper fertilization and nutrition are essential for promoting the healthy growth and vibrant foliage of your lady fern. In this section, we will explore the key aspects of fertilizing and providing necessary nutrients to your fern.
A. Understanding the Nutritional Needs of Lady Ferns: Lady ferns have moderate nutritional requirements. They benefit from a balanced fertilizer that provides essential macronutrients (nitrogen, phosphorus, and potassium) as well as micronutrients (such as iron, magnesium, and manganese). These nutrients support overall plant health, foliage development, and resilience.
B. Appropriate Fertilizers and Application Methods: Choose a well-balanced, slow-release fertilizer formulated specifically for ferns or general houseplants. Opt for a ratio such as 10-10-10 or 20-20-20. Follow the instructions provided on the fertilizer packaging for the recommended application rates. Avoid over-fertilizing, as this can lead to fertilizer burn or nutrient imbalances. Apply the fertilizer evenly around the base of the fern, taking care to avoid direct contact with the foliage.
C. Timing and Frequency of Fertilization: Lady ferns benefit from regular but moderate fertilization. During the active growing season, which is typically spring and summer, apply a diluted liquid fertilizer every two to four weeks. Reduce the frequency to once every two months during the fall and winter months when growth slows down. Always water the plant thoroughly after fertilization to ensure the nutrients are absorbed effectively.
Additionally, organic amendments such as compost or well-rotted leaf litter can be incorporated into the soil during planting or as a top dressing. These organic materials gradually release nutrients into the soil, enhancing the overall fertility and structure. Remember to observe your lady fern for any signs of nutrient deficiency or excess. Symptoms such as yellowing or stunted growth can indicate nutrient imbalances, and adjustments to the fertilization regimen may be necessary.
Pruning and Maintenance
Regular pruning and maintenance are essential for keeping your lady fern healthy, promoting new growth, and maintaining its attractive appearance. In this section, we will provide you with guidelines on pruning and general maintenance practices for your lady fern.
A. Removing Dead or Damaged Fronds: Regularly inspect your lady fern for any dead, yellowed, or damaged fronds. These fronds should be promptly removed to maintain the plant’s overall health and aesthetics. Use clean and sharp pruning shears or scissors to make clean cuts near the base of the frond where it emerges from the crown.
B. Trimming Tips for Promoting New Growth: Lady ferns can benefit from occasional trimming to encourage new growth and maintain a compact shape. To trim your fern, identify any excessively long or straggly fronds and trim them back to the desired length. Make the cuts just above a leaflet junction or node to encourage new growth to emerge.
C. General Maintenance Practices:
- Clean the fronds: Gently wipe the fronds with a damp cloth or sponge to remove dust or debris that may accumulate. This helps to keep the leaves clean and free from pests or diseases.
- Check for pests and diseases: Regularly inspect your lady fern for any signs of pests or diseases, such as aphids, scale insects, or fungal infections. If detected, take appropriate measures to address the issue promptly.
- Maintain humidity levels: Lady ferns appreciate high humidity. Misting the fronds regularly or placing the plant near a humidifier can help maintain the desired humidity levels.
- Monitor soil moisture: Continuously monitor the moisture levels in the soil and adjust your watering routine accordingly. Avoid letting the soil become waterlogged or overly dry.
By practicing regular pruning and maintenance, you will help your lady fern maintain its health and vitality. Additionally, staying vigilant and addressing any issues promptly will ensure the long-term well-being of your fern.
Common Pests and Diseases
While lady ferns are generally resilient plants, they can still be susceptible to certain pests and diseases. In this section, we will explore common issues that can affect your lady fern and provide guidance on prevention and treatment methods.
A. Pests Affecting Lady Ferns:
- Aphids: These small insects feed on the sap of the fronds, causing curling, yellowing, and stunted growth. Use insecticidal soap or a strong stream of water to remove aphids from the plant. Repeat the treatment as necessary.
- Scale Insects: Scale insects appear as small, waxy bumps on the fronds. They can cause yellowing, leaf drop, and overall weakening of the plant. Remove scale insects manually or use horticultural oil to suffocate them.
- Mealybugs: Mealybugs are white, cotton-like insects that gather on the fronds and feed on the sap. Control them by dabbing them with a cotton swab dipped in rubbing alcohol or using insecticidal soap.
B. Diseases Affecting Lady Ferns:
- Fungal Diseases: Lady ferns can be prone to fungal diseases such as leaf spot, rust, and powdery mildew. Ensure good air circulation around the plant, avoid overhead watering, and remove infected fronds promptly. Fungicides may be necessary for severe cases.
- Root Rot: Overwatering or poorly-draining soil can lead to root rot, causing wilting, yellowing fronds, and root decay. Improve drainage and adjust your watering routine to prevent waterlogged conditions.
C. Prevention and Maintenance:
- Maintain proper air circulation: Ensure adequate spacing between plants to promote good air circulation, which helps prevent fungal diseases.
- Water correctly: Avoid overwatering and ensure the soil has proper drainage. Water at the base of the plant, keeping the fronds dry.
- Quarantine new plants: When introducing new plants to your collection, isolate them for a few weeks to monitor for any signs of pests or diseases before placing them near existing lady ferns.
Regular inspection and prompt action are crucial to managing pests and diseases effectively. By practicing good cultural care, maintaining a healthy environment, and taking preventive measures, you can minimize the risk of pests and diseases impacting your lady ferns.
Propagation Techniques
Propagating lady ferns is an excellent way to expand your collection or share these beautiful plants with others. In this section, we will explore the various methods of propagating lady ferns.
A. Division Method:
- Select a mature lady fern: Choose a healthy, well-established lady fern with multiple crowns and fronds.
- Prepare the plant: Gently remove the fern from its pot and shake off excess soil. Carefully separate the crowns into smaller sections, ensuring that each section has its own roots and fronds.
- Plant the divisions: Place each division in a separate pot filled with well-draining potting mix. Ensure the top of the root ball is level with or slightly below the soil surface.
- Water and care for the divisions: Water the divisions thoroughly after planting, and provide them with the same care as mature lady ferns, including appropriate light, temperature, and humidity conditions.
B. Spore Propagation:
- Collect spores: Look for mature lady fern fronds that have developed brown spots on the undersides. Place a paper bag beneath the frond and gently shake or tap it to release the spores into the bag.
- Prepare a growing medium: Create a spore-growing mixture by combining equal parts of peat moss and sterile potting mix.
- Sow the spores: Spread the collected spores evenly over the surface of a small pot or seed tray filled with the spore-growing mixture. Do not bury the spores, as they need light to germinate.
- Provide optimal conditions: Cover the pot or tray with a plastic lid or place it inside a plastic bag to create a mini greenhouse. Place it in a warm and bright location, avoiding direct sunlight.
- Patience and care: Keep the spore-growing medium consistently moist and maintain high humidity. After several weeks, you will see tiny green prothalli (heart-shaped gametophytes) emerging. Once they grow larger, you can transplant them into individual pots.
C. Rhizome Cuttings:
- Select a healthy rhizome: Choose a healthy lady fern with vigorous rhizomes.
- Cut and prepare the rhizome: Using a clean and sharp knife or shears, cut a section of the rhizome that has several healthy fronds attached. Ensure the cutting has some roots attached as well.
- Plant the cutting: Place the cutting in a pot filled with well-draining potting mix, burying the cut end of the rhizome just below the soil surface. Firmly press the soil around the cutting.
- Provide care: Water the cutting thoroughly and provide it with the same care as mature lady ferns. Keep the soil consistently moist and provide appropriate light and humidity levels.
Propagation can be a rewarding process, allowing you to create new lady ferns and expand your collection. Whether you choose division, spore propagation, or rhizome cuttings, each method offers its unique experience and results.
With these propagation techniques, you can enjoy the beauty of lady ferns in multiple pots or share their elegance with fellow plant enthusiasts.
Frequently Asked Questions
Q1. How often should I water my lady fern?
A: Lady ferns prefer consistently moist soil. Water them whenever the top inch of soil feels slightly dry to the touch. Avoid overwatering, as it can lead to root rot. It’s better to slightly underwater than overwater. Monitor the moisture levels and adjust your watering schedule accordingly.
Q2. Can I keep my lady fern outdoors?
A: Lady ferns can thrive both indoors and outdoors. They prefer partial shade or filtered sunlight and a humid environment. If you decide to keep them outdoors, ensure they are protected from direct sunlight and harsh weather conditions.
Q3. How do I increase humidity for my lady fern?
A: Lady ferns appreciate a humid environment. You can increase humidity by misting the fronds regularly with water or placing a tray filled with water near the plant to allow for evaporation. Grouping your ferns together can also create a more humid microclimate.
Q4. Should I fertilize my lady fern?
A: Lady ferns benefit from regular but moderate fertilization. Use a balanced, slow-release fertilizer formulated for ferns or general houseplants. Follow the instructions on the fertilizer packaging for the recommended application rates. Fertilize during the active growing season and reduce frequency during fall and winter.
Q5. How do I propagate lady ferns?
A: Lady ferns can be propagated through division, spore propagation, or rhizome cuttings. Division involves separating the plant into smaller sections with roots and fronds. Spore propagation involves collecting spores from mature fronds and sowing them on a suitable medium. Rhizome cuttings can be taken from healthy rhizomes with attached fronds and roots.
Q6. Can lady ferns tolerate low light conditions?
A: Lady ferns prefer bright, indirect light, but they can tolerate lower light conditions. However, in low light, their growth may slow down, and they may become leggy. Ensure they receive some natural light or supplement with artificial grow lights if needed.
Q7. How do I prevent pests and diseases in my lady fern?
A: To prevent pests and diseases, maintain good air circulation around the plant, avoid overwatering, and ensure proper drainage. Inspect your fern regularly for any signs of pests or diseases, and take prompt action if detected. Quarantine new plants before introducing them to your existing collection.
Q8. Can I prune my lady fern?
A: Yes, pruning is beneficial for lady ferns. Remove dead, yellowed, or damaged fronds to maintain plant health. Trimming can also be done to promote new growth and maintain a compact shape. Use clean and sharp pruning shears or scissors to make clean cuts near the base of the frond.
Q9. Can lady ferns be grown in hanging baskets?
A: Lady ferns can be grown in hanging baskets, as long as the baskets provide proper drainage. Use a well-draining potting mix, and ensure the basket is securely hung to prevent accidents. Monitor the moisture levels and adjust watering accordingly.
Q10. How long does it take for lady ferns to grow to their full size?
A: Lady ferns grow at a moderate pace. It can take several years for them to reach their full size, typically ranging from 2 to 4 feet (60 to 120 cm) in height and spread. The growth rate can vary depending on the growing conditions and care provided.
These frequently asked questions cover some common concerns and queries regarding caring for lady ferns. By following the recommended practices and addressing specific needs, you can enjoy the beauty and lush foliage of these elegant ferns in your home or garden.
Conclusion
In conclusion, caring for a lady fern involves understanding its specific needs and providing the right environment, watering, fertilization, pruning, and maintenance. By creating an ideal environment with filtered sunlight, moderate humidity, and well-draining soil, you can ensure the fern’s healthy growth. Proper watering, avoiding overwatering, and maintaining appropriate moisture levels are crucial for its well-being. Fertilizing with a balanced fertilizer, regular pruning, and addressing common pests and diseases help maintain the fern’s vitality. Additionally, knowing how to propagate lady ferns allows you to expand your collection and share their beauty with others. With the right care and attention, lady ferns can thrive and bring a touch of elegance to any indoor or outdoor space. Enjoy the lush foliage and graceful presence of lady ferns as you cultivate a thriving botanical sanctuary.